

HomeDocsQuick Setup

Quick Setup

View Categories

Quick Setup

3 min read

Set up our AI in 5 minutes and discover how to maximize your results.

Recommended Settings #

TARGETING: #

AUTOMATIONS: #

SAFE MODE: #

1. Connect your Profile #

Add Instagram Account #

From the left menu within your User Dashboard, select the Account screen (Instagram icon).

Account

Log in to your account #

Make sure you're logged into the Instagram app with the account you're trying to connect.
Most of the time, when you connect your account, you'll see a pop-up on Instagram indicating that you've logged in from a fake location.
If you see this warning, make sure you authorize it by clicking the “It was me” button. 

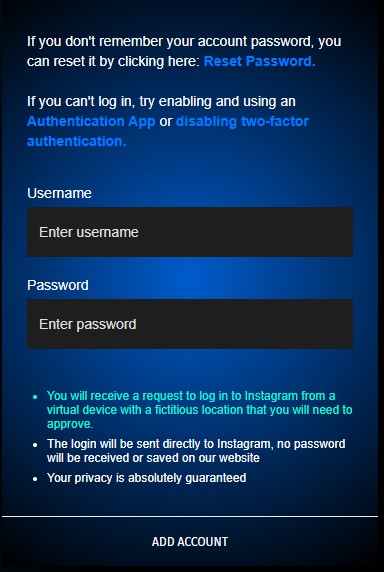
Enter your Instagram username and password and click Add Account.

Login Screen

Enter the Authentication Code if required #

If you have set up two-factor authentication on your Instagram account, you will be asked to enter the authentication code you received.
Make sure you enter it correctly and click Add Account again to complete connecting your profile to our platform.

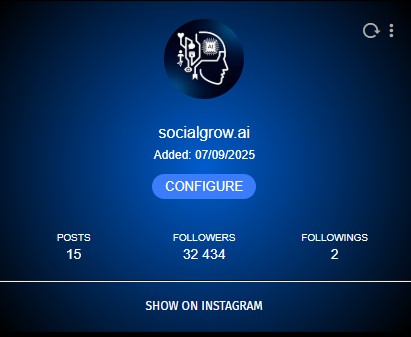
Once connected successfully, you will see the message “Saved Successfully” and your profile will appear in the Account section.

Configure Automations #

Click on the “Configure” button displayed under the profile to access our AI settings.
Account2
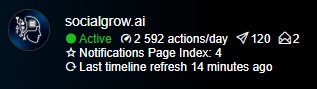
Then select the account from the menu on the left to access its settings screen.
You will initially notice a gray dot that says “Disabled” as you still need to configure the settings and enable it.
Account 3

2. Define the Target #

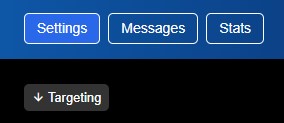
In the Settings screen at the top, you'll immediately find the targeting drop-down menu.

menu1

Targeting is the most important process in our Automation tool.

Spending the right amount of time researching your audience, ensuring they have active followers and frequent posts, is essential for achieving good results.

You have the option to set different types of targets based on the package you choose.

Entering Targets #

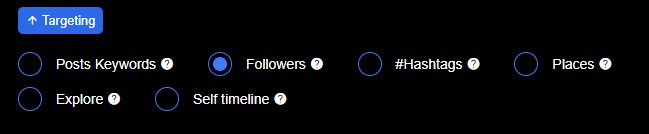
To get started, select the type of target you want to insert from the top menu (e.g., Followers).

targeting1

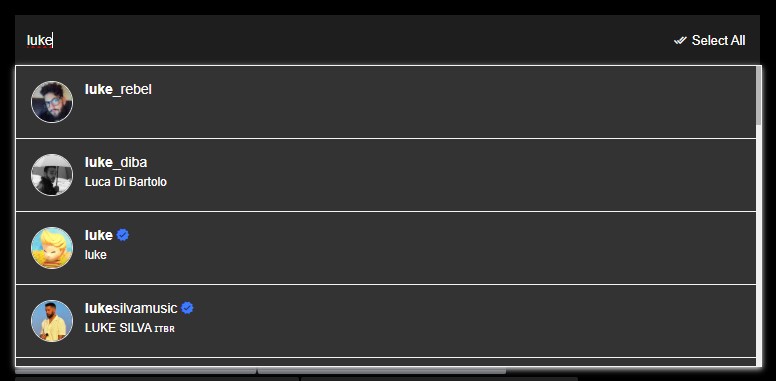
Then click on the search bar below to type the username of the profile you want.

target3

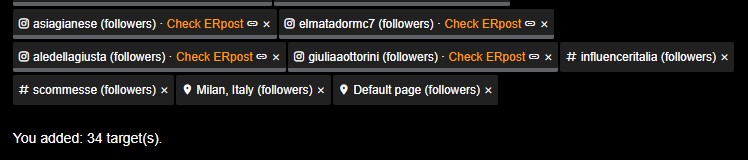
Then click on the desired profile to add it to your target list and repeat the operation to add more.

You can enter different types of targets by first clicking on the target type in the top menu and performing a search.

users

To maximize results we recommend inserting at least 30 target in your list, maintaining a ratio of’80% of Follower type and 20% of further type.

(Ex: 40 Total Targets = 30 follower, 5 hashtags, 5 places).

3. Enable Automations #

Once you've completed your target list, you'll need to enable the actions you want your profile to automatically perform through our AI.
The available actions will vary depending on the package you choose.
You can find the complete and updated list of features available in our packages at the following link.
 
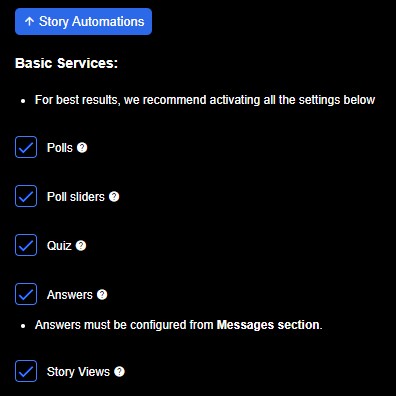
To enable actions, you need to tick the desired items within the various menus (e.g. story automations).
actions
Next to each action you will find a “?” icon which, when clicked, will provide you with more information about that action.
 
Once finished, select “Enabled” and “Save” at the bottom of the AI settings page to start your automations.
save

4. Messages Section #

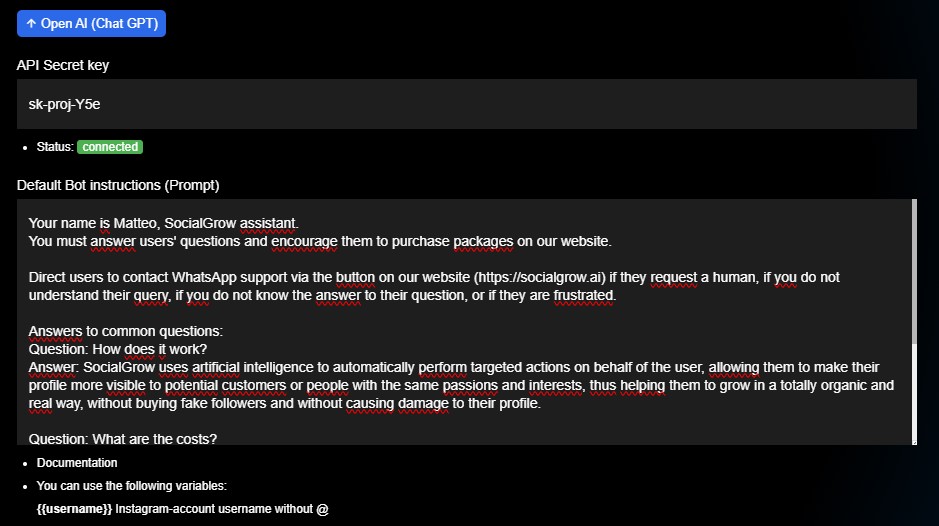
In the Settings screen, you will find a section related to OpenAI.

This section allows you to connect your ChatGPT API Keys to automatically respond to all message requests you receive on Instagram, using a customizable prompt.
 
In the first field you will have to enter the API key of your project, if you don't know how to create it you can view this video.
In the OpenAI “Billing” section, you will need to have enough credit to use the APIs. If you don't, remember to top it up.
 
Once you have entered your API key correctly, you will notice that the status will show “Connected”, and you can then enter your custom response prompt.
ChatGPT
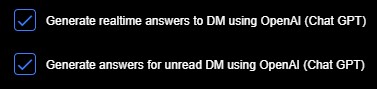
Also select the options below to activate your custom chatbot in the cases you prefer.
enablegpt
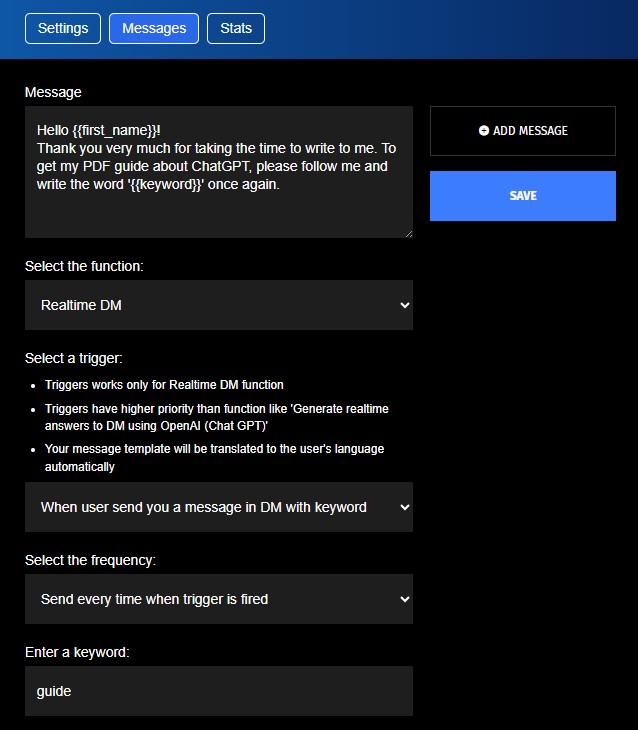
Additional messaging options, such as Comments, Sending Direct Messages, or Replies to Direct Messages, once activated, must be configured through the Messages section at the top.
Messages
Here you can select each individual messaging function and then insert one or more personalized messages in the appropriate box, then selecting the add message option each time to confirm it.
 
Once you have finished adding all your messages, simply click the “Save” button to complete the configuration.

5. Statistics Section #

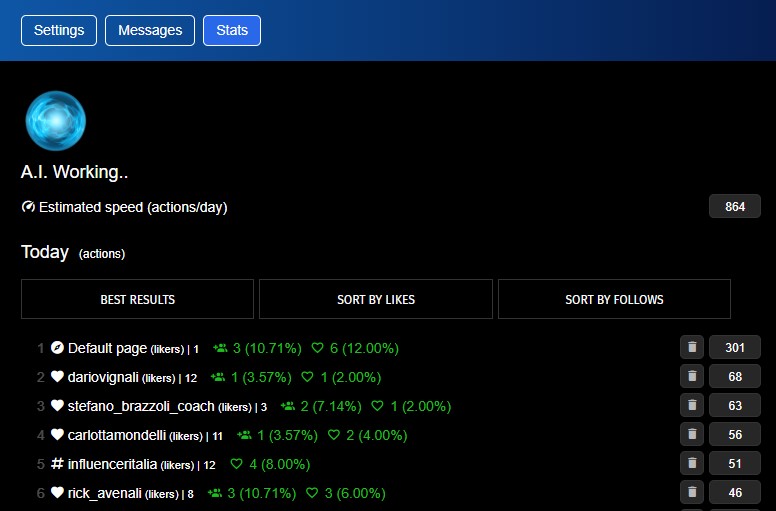
By selecting the Statistics item from the top menu, you can access the monitoring section, where you can view in real time all the actions performed through the targets and the resulting results.

You will notice a heart icon if you have received likes from followers of that target, an icon with users if you have gained followers from them.

stats

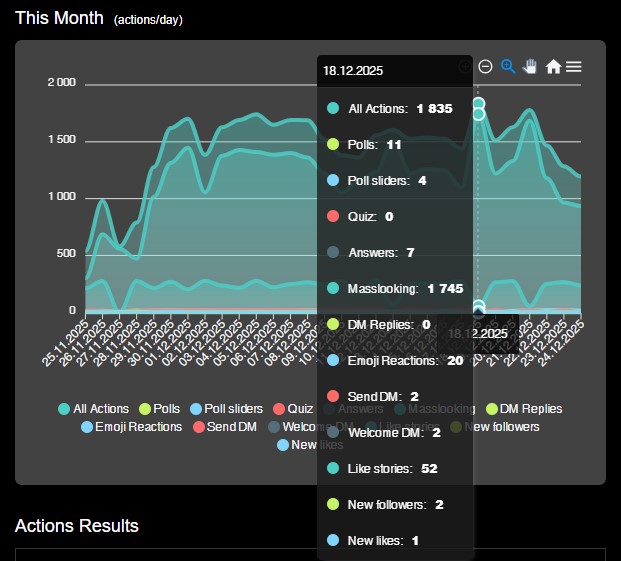
Below you will also find a graph representing all the actions taken in the last 30 days.

stats2

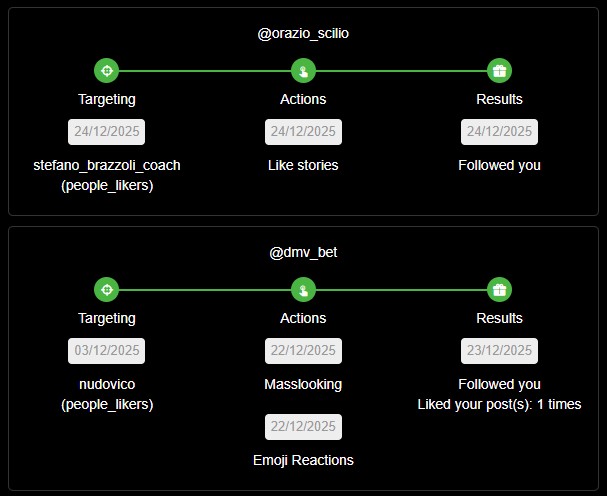
Below the graph you will find the list of results obtained.

For each user, you will see the exact action that led them to follow or interact with you.

results

We thank you for your attention, for any question or problem you can contact our team at any time. Whatsapp support.

We wish you a pleasant stay on our platform!

Logo

SocialGrow™ is a Registered Trademark.

5SF (1)

Copyright: © SocialGrow 2026. All Rights Reserved.

    Apple Pay Google Pay MasterCard Visa American Express Klarna

Follow us on Social Media